Recent Posts

(sibForm) #title=(Stay Informed) #caption=(Get Notified About Next Update Direct to Your inbox)

https://be075e8d.sibforms.com/serve/MUIEAM0UKoN8OYM0JwbWNEffDqBgBgDKuJOt8MUT4xRoZt3QnGcSULt4SVKnDSJl30T7PZ-eKk4PXiHDyV3BU0fJr73eLdUGXhTLY5oavcO0I0DDaUlnd-XplEBhe9k1b5XDK9wJAH9gvy-GA7URRf3g5eyiogd8rwaB4u3ZnL-pD73DxW7tElpKRwOK3unn0IDnjxF4QWXAhNjJ

Baddha Parsvakonasana (Bound Side Angle Pose)

Baddha Parsvakonasana (Bound Side Angle Pose)


Inhale and step your left leg straight back into a lunge from Utkatasana. Open into Virabhadrasana II as you exhale. It's a stance you've probably done a million times before, but you haven't done Warrior II like this before, so be cautious.

Take a moment to feel the weight of your feet on the floor once more. Relax your mouth and neck. You might feel as if you could stay here forever, riding confidently in the saddle of your warrior seat, if you discover the appropriate level of exertion—not too much, not too little.
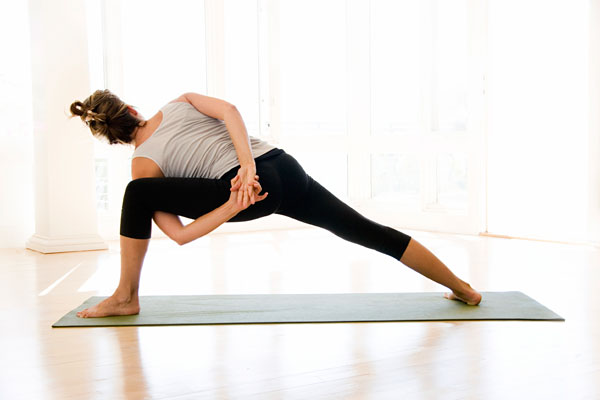


You'll need to do a series of arm rotations to establish fluidity, awareness, and precision in your shoulders, chest, and upper back before proceeding into Baddha Parsvakonasana. Arm and leg rotations usually start at the base of the limbs. Invite your shoulder blades' inner bottom edges to move toward one other, lift your armpits, and roll your shoulders.

To establish external rotation of the arms, bring your shoulders back. Your palms will spin upwards, and your chest will feel larger. By separating the shoulder blades and sliding the shoulders forward while turning the palms back, you may reverse this. Internal rotation shuts up the chest while broadening the upper back. 


Continue the rotations, inhaling as you externally rotate your arms and exhaling as you internally rotate them. Notice which way is easier for you and if that changes as you repeat this action 6 to 10 times, ending in external rotation.

Traighten your legs for a moment as you exhale, and rest here for two more breaths. Then inhale back into Warrior II. Exhale, bend to the right, and place your right forearm on your right thigh. Extend your left arm straight up to the ceiling and internally rotate it. Bring your left arm around your back and hold on to the top of your right hip crease. If this is too intense, place your hand on your sacrum instead. If this is easy for you, dip your right shoulder under your right knee and internally rotate your right arm. Reach up between your legs, and try to take hold of your left wrist with your right hand.

Go only as far as you can without distorting the lower-body alignment of  So, if you have to stick your bum way out to reach under your leg, it means that binding the pose is not available to you today. If that happens, it’s OK. Just notice it, rewind, and find a middle path that balances your ambition with healthy sensation.


Some yoga poses may come to you quickly and easily, with little struggle in flexibility or strength. Other poses can feel nearly impossible, even after years of practice. Utkatasana (Chair Pose) falls into a category of its own: It looks deceptively easy and straightforward; yet, when you try it, you’ll find it demands a great deal of flexibility in the shoulders as well as stability in the core and strength in the legs.

That is the challenge of Chair Pose. Its simple form offers little promise of glory. For all the effort it requires, you won’t end up with your leg wrapped behind your head or in some other fancy position. When I teach Chair, at first it produces more frowns and even moans than almost any other pose. Yet when I ask my students to persevere, they are always glad they did. It’s hard while you’re in it, but in the end this pose brings a satisfying sense of accomplishment. It teaches you the determination you need to meet a challenge and the perseverance to return to it repeatedly over time, despite its difficulty. 


Chair Pose will strengthen your thighs, helping to stabilize your knees. Your ankles will become more limber and sturdy, and your arms and shoulders will gain power and flexibility. As you reach your arms up and stretch the muscles between your ribs, you’ll increase your breathing capacity. The pose can also help improve your posture. All of the core muscles fire as you hold the pose, lifting your pelvis into a more upright alignment and working against the tendency to exaggerate the arch of the spine as you reach up and back with the arms. Whew! Sound like a lot? That’s the point of Chair Pose: You learn to handle many actions all at the same time for what feels like way too long.

It’s helpful to practice Chair in two parts. First, practice the pose with the lower half of your body. Before adding the arms, work on bending your knees toward a right angle while shifting your weight back into your heels. Then, stand tall in Tadasana (Mountain Pose) and work on extending your straight arms up and overhead without letting your rib cage jut forward or your back overarch. Finally, you can bring all the elements together into a cohesive and powerful whole. Unite the work of the legs and arms by bringing your awareness to your torso as you lift your core muscles and lengthen your spine.


If you commit to a steady practice, you will gain stamina in this pose after a few months. When you take a break from your practice, it might feel as if all of your progress is gone once you return to the mat. If this is your situation—if your muscles are burning in Chair and it’s a sweaty struggle of will—don’t be discouraged. The pose is teaching you its most important lesson and a key concept in yoga: Steady practice over time is better than occasional, intense spurts. It’s worth maintaining a regular daily practice rather than feeling like you have to start all over again each time you do a pose. Consistency in yoga yields deep and lasting results.


Feeling fierce? Utkata means “powerful” or “fierce,” and while this pose calls for fiery power in the body, it’s best practiced with a cool mind. Notice if you crunch your brow or clench your jaw; if so, relax them. If your breathing starts to turn into panting, lengthen your exhalations. You’ll feel cooler and more focused.

Parivrtta Utkatasana (Revolved Chair Pose)

 Step-by-Step Instructions for the Noose Pose

Step 1

Stand next to a wall in Tadasana (Mountain Pose), your feet hip-width and parallel to each other. The ideal distance between you and the wall is forearm distance. So, when you're standing there,With the wall on your right side, swivel to the right and press your right palm into the wall, keeping your forearm parallel to the ground from wrist to elbow. Adjust your distance from the wall and return your torso to its original position.  


Step 2

Bend your knees and sit your buttocks on your heels in a complete squat. Squat with your heels lifted on a heavily folded blanket or sandbag if you can't get your heels fully on the floor.


Step 3

Swing your knees slightly to the left. As you exhale, turn your torso to the right and press both hands into the wall. As your left hand presses into the wall, the elbow should press against the outside of your right knee. Support the pose by using your right hand for leverage-the right hand will be high and the left hand will be low. For the full pose, it’s necessary to close any space between the left side of the torso and the tops of the thighs. So work the back of the left arm down the leg, moving the back of the left shoulder toward the outside of the right knee.


Step 4

Still, you can be sure that when you fold your legs like a grasshopper, bend your ankles into a superlow squat, twist in half, and hold hands with yourself behind your back, a variety of sensations and emotions will arise. Although examining those feelings is an important part of the yogic process, beware of sensation hunting. Notice whether you instinctively push and pull on yourself until the grasping noose of your arms becomes like a scary vice that inhibits your breathing. Struggling in your asana practice like this leads to injury, and it can dull your natural sensitivity to the point where you don’t feel anything at all without extreme effort. The whole idea of yoga is to tune in to yourself so that you can create more sensitivity to subtlety—not less.


At the same time, Pasasana is a pose that requires some perseverance. If you are too passive as you practice, you will miss the vibrant aspect of juicy exertion that strengthens your muscles and bones and increases your ability to stay focused. Put simply: If you don’t put enough oomph into it, you’ll never touch your hands behind your back.

Step 5

The solution then, is to look for the middle path, the place where you walk the line between too much effort and complete passivity. You tap into the middle path by listening to your body, moving with sensitivity, and engaging with what’s happening. You often hear the phrase “being present to the moment.” What this really means is being part of the moment. This happens through the middle path of commitment, patience, and listening.

The Buddha offered insight into this process. The story goes that a musician asked the Buddha how he should

. The Buddha replied, “How do you tune your instrument?” The musician said, “Not too tight, not too loose.” The Buddha said, “Exactly like that.” If you learn to apply this to Pasasana, your noose will evolve into a warm feeling of being held and supported by yourself and by your healthy, wakeful, engaged practice.

Step 6

Before You Begin

Before you begin this practice, sit in a comfortable cross-legged position for 5 to 10 minutes. Place your attention on your natural breath to create a home base for your mind. Whenever your attention strays, bring it back to the breath.

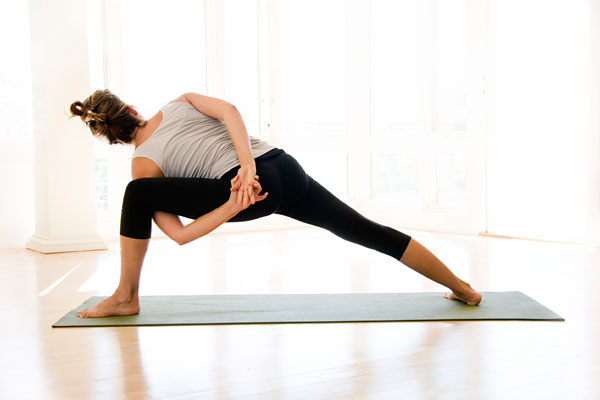
Parivrtta Utkatasana (Revolved Chair Pose)

Stand with your feet together, toes and heels touching. Lift your toes and spread them wide. Place each toe back on the floor individually, letting them touch each other as you press them firmly into the floor. From this clear connection to the earth, begin to soften the knees, moving the shins forward as the upper thighs move down and back. Lift your arms up alongside your ears.

Your spine, ribs, and pelvis will maintain the alignment of Tadasana, except that you will be leaning forward on a slight diagonal. If you notice that your front ribs are popping out, don’t tilt or tuck your pelvis; instead, move your upper arms slightly forward on a diagonal. Rest your gaze on something right in front of you so that your forehead can be soft. 

Now imagine you had to stay in this pose for an hour! What would you change? What would it take to make this situation workable? Would you breathe more steadily? Release muscular tension? Ask these questions to help you find a middle-path approach to this powerful pose.

Sensitively fold your palms together in front of your chest. Inhale, and as you exhale, twist to the right. On your next inhalation, untwist. Repeat that action, twisting and untwisting two more times. Discover how much is truly available to you today without using your arms to crank into the twist.

The next time you twist, place your left elbow on the outside of your right knee and stay there. Instead of reacting by trying to fix or change your position, treat whatever is happening as something interesting. Take a look down at your feet and align your nose over your big toes—that’s how you can tell if you are accurately rotating around the axis of your spine.

Check to be sure that your knees are even, and if your left knee is in front of your right knee, draw your outer left hip crease back. When your body is organized, turn your head and look to the side or up to the sky.

This pose is considered a closed twist because you are turning in on yourself—closing your front toward your legs and creating a slight forward bending action in the spine. To balance this with more heart opening, allow the part of your spine between your shoulder blades to absorb into your body; that, in turn, will broaden your chest. Press your palms together just enough—not too hard—to spread your collarbones.

Check back in with your feet. Are they still firmly planted? Try to center your weight on the middle of each foot. Press your inner heels down, and at the same time, lift your inner ankles up, since they tend to collapse in this position. Perhaps you can breathe some softness into the front of the ankles so they bend a bit more, lengthening the calf muscles and the Achilles tendons.


Stay here, breathing evenly for a few more breaths, and observe if there is any opening or softening that allows you to twist around more. Inhale to untwist.


Why does India observe Teachers' Day a month ahead of the rest of the world?

 Why does India observe Teachers' Day a month ahead of the rest of the world?


Teachers' Day is observed in India on September 5, a month before World Teachers Day, which is observed on October 5. This is why.

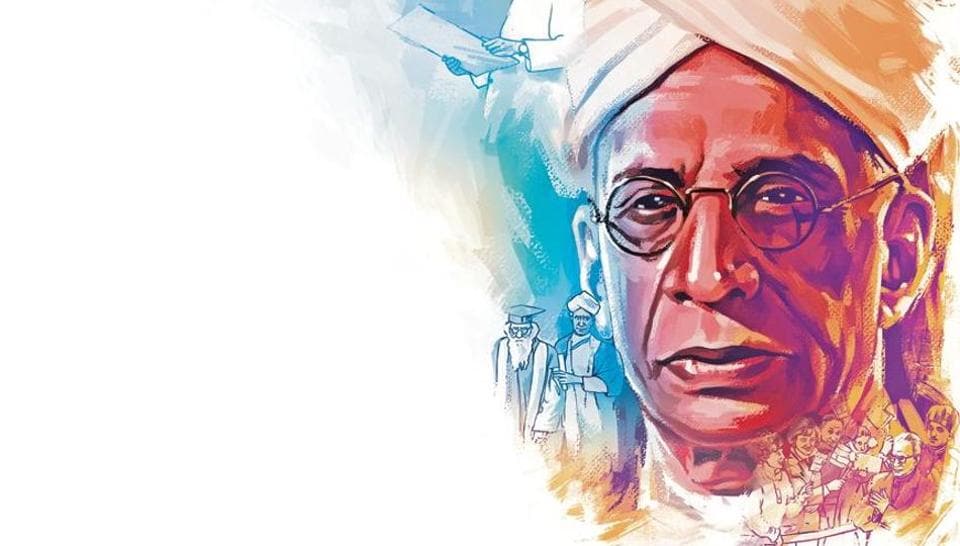
Tomorrow, September 5, India will commemorate the birth anniversary of Dr Sarvepalli Radhakrishnan, a brilliant philosopher, teacher, scholar, and the country's second President. India celebrates Teacher's Day a month early of World Teachers' Day, which falls on October 5.

International Teachers Day is observed by the United Nations Educational, Scientific and Cultural Organization (UNESCO), the United Nations Children's Fund (UNICEF), the International Labour Organization (ILO), and Education International to commemorate the adoption of the 1966 ILO/UNESCO recommendation concerning the status of teachers, their rights and responsibilities, and standards for teachers.


Since 1962, India has commemorated September 5 as Teachers' Day to recognise Dr. Radhakrishnan's extraordinary approach to education and students.

This year, the Education Ministry will be celebrating the Shiksha Parv between September 5 and 17 as part of the celebrations.

This year’s celebrations will be more vibrant, more colorful, as schools in many parts of the country have reopened after months, after a devastating second wave of COVID-19 that shook the country earlier this year.


Teacher’s Day 2021 is on September 5 and this day brings back many memories for almost al of us. A day celebrated in honour of our beloved teachers who shaped us with their knowledge, love, scoldings and punishments is unforgettable. As children, we dress well, make cards and get flowers for our teachers. Some get them cupcakes and gifts to impress as well.  

For the unversed, this day is originally celebrated in the memory of India’s second President, Dr Sarvepalli Radhakrishnan, who was a teacher par excellence! 


Teachers’ Day Messages

Happy Teacher’s Day! It has been an honor to get to learn so many things from you; thank you for inspiring me! We need more instructors like you in our schools and universities. 

All the efforts and hard work you invested to bring out the best in us can never be repaid in mere words. We can only feel grateful for having a teacher like you! 


Teachers are a very important part of our lives. They not just educate us about various disciplines, but also play a very significant role in our overall development. In order to honour their efforts, Teachers' Day is celebrated.

It is observed on different days in different countries. In India, it is celebrated every year on 5 September to commemorate the birth anniversary of great educationist and philosopher Dr Sarvepalli Radhakrishnan. He was also second President of independent India.

Various dance, music and other celebratory events are organized in schools, colleges, and coaching centres on the occasion of Teachers' day. Students present their teachers with greeting cards and wishes.

In this article, we have curated some wishes, images, and quotes which you can send to your teachers on the auspicious occasion of Teachers' Day.